Washing and curing are necessary steps to remove uncured surface resin and harden the print that ensures durable and strong properties. This article will provide a comprehensive guide on what needs to be prepared before curing, how long to cure 3D resin prints according to different methods, and how to determine a fully cured resin 3D print.
What You Should Do Before Curing?

Wash and clean 3D resin prints
Tools you need:
- Isopropyl alcohol (≥95%)
- Nitrile Gloves
- Silicone Mat
- Face Mask
- Spray Bottle
- Cleaning Cloths
Safety first, when handling uncleaned resin prints, work in a well-ventilated area, as well as, wear masks and gloves to avoid direct contact. Personal protective equipment (PPE) can effectively protect users from the toxic fumes emitted by uncured resin. Among different types of gloves, nitrile gloves are recommended, which won't trigger chemical reactions with resin. Anycubic Cleaning Kit is a value pack for post-processing 3D printed objects, including reusable thick nitrile gloves, a silicone mat to avoid a mess, a spray bottle to clean hidden corners and other useful tools.
Using a cleaning solvent is essential to initiate the washing process. Ethanol or IPA with 95% or higher is recommended to achieve a thorough clean. However, if the concentration of IPA is insufficient, it can lead to poor cleaning performance like white residue remaining on the surface of the print after cleaning. If you are looking for more information on post-processing washing, you may find this article on "How to Wash and Clean 3D Resin Prints" helpful.
Dry your resin prints before curing
It is a common mistake for beginners in resin 3D printing that cure the part immediately after washing and support removing. This can lead to defects like cracks, as the resin will absorb excessive moisture during curing. What should you do after washing? Dry your resin print surface and keep it far away from UV light. If you're in a hurry, hair dryers and towels can be used as an accelerator that helps to speed up the curing process. Or you can just leave it to air dry naturally.
What Are the Different Curing Methods?

1. Professional Curing Station
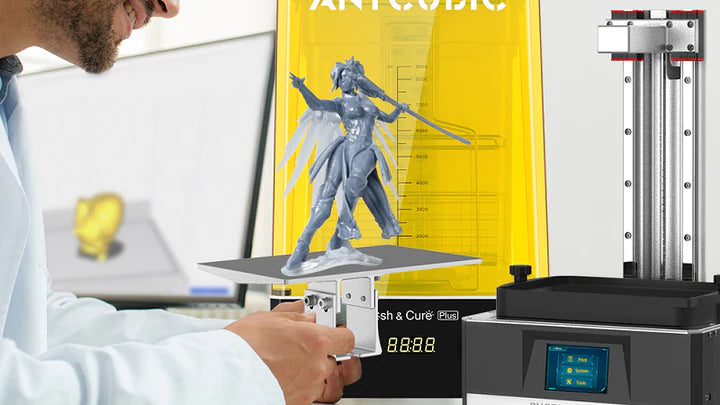
There's no better method for efficiently post-processing sticky resin prints than using a curing station specifically designed by the manufacturer for their 3D printers and resin. Anycubic, a manufacturer of desktop 3D printers, offers two models of two-in-one cleaning machines to meet the needs of users.
They vary in size and curing strength. Wash & Cure Machine Plus not only has a larger size served for large format resin printers like Anycubic Photon M3 Max, but also enhances the curing effect like bendable L-shape, 360° rotating platform and more built-in lamp beads to ensure full curing. The specifications for the two machines are compared below.
| Wash & Cure Machine Plus | Wash & Cure Machine 2.0 | |
|---|---|---|
| Machine size | 290*270*479mm | 225*235*365mm |
| Average-sized | 3-5mins | 3-5mins |
| Washing size | 192*120*290mm | 120*74*165mm |
| Curing size | 190*245mm | 140*165mm |
| Lamp beads quantity | 20 | 12 |
| Features | Reflector Safe auto-pause L-shape strip light |
Reflector Safe auto-pause |
| PROS: | CONS: |
|---|---|
|
|
|
2. UV Nail Lamp
This is a cheap alternative to a curing station which is easily accessible for around $20. However, you need to regularly check and turn the printed object, or else it is easy to get an uneven curing result. Additionally, when you are going to cure a larger object, you will face an embarrassing situation, and that is, the nail lamp cannot accommodate such a print of a relatively big size. Thus, the UV nail lamp has a limit in curing large objects, after all, it is designed for nail beauty.
| PROS: | CONS: |
|---|---|
|
|
|
3. Natural Sunlight
Place the resin model in direct sunlight for hours, which is the cheapest way but the most time-consuming and troublesome one. If you don't have any device that can emit UV rays, take advantage of the sun. Instead of manually turning the object by hands, an automatically rotating display stand can make you easier for it.
But the untreated resin print cannot be cured at any time, since the weather is constantly changing. It is advisable to check the weather forecast in advance to prepare for any cloudy or rainy days, and wait till the sun comes out to move your process. In this case, the UV light source from the sun will be unstable, while, most UV resins, like Anycubic UV Resin, require to be exposed to consistent wavelengths between the range of 365nm and 405nm. Due to all these uncertain factors, this method requires the most amount of time to fully cure. Therefore, it is not recommended for beginners to directly use the sun to cure.
| PROS: | CONS: |
|---|---|
|
|
|
How Long It Will Take to Cure Your Resin 3D Prints?
In general, the curing time for curing stations and UV nail lamps is similar, but curing stations are generally considered to be the most stable and convenient option. On the other hand, sunlight is the least reliable, taking the longest time to cure resin prints. The following table is a simple guideline.
| Curing Station | UV Nail Lamp | Sunlight | |
|---|---|---|---|
| Miniature | 1-2mins | 1-2mins | 2-3h |
| Average-sized | 3-5mins | 3-5mins | |
| Large-sized | 5-10mins | 5-10mins | 10h |
There are many factors that affect curing performance such as print size, print geometry, UV Wavelength, resin types, curing temperature..., so the time may need to be shortened or extended on basis of the table above. To find the optimal curing time, it is necessary to gain experience through trial and error.
How to See Whether the Resin Prints Are Fully Cured?

A smooth or matte surface indicates full curing. Also, you can make a simple hardness test by dropping the object lightly on the table. If it makes a loud and clear sound like that of a stone, it is determined as a sign of success.
An under-cured result appears wet and sticky with liquid residue remaining on it. The uncured resin is generally considered toxic and can pose health and safety hazards. This can be caused by the insufficient time for washing or curing.
Over-curing makes a part brittle and prone to cracking. Moreover, if clear and light-colored resins over-cured, are more likely to yellowing, compared to the dark colored, because more UV rays are able to pass through clear materials during curing. Printing with a special resin is also an effective option for preventing yellowing, Anycubic offers High Clear Resin, which produces a crystal-clear finish and is highly resistant to yellowing.


