Leveling is an important step in 3D printing, what happens if the build platform is not level? In the resin printing process, we will also face the leveling problem, which is mainly related to whether the resin tank and the build platform are level or not. If the resin printer is not adjusted correctly, the 3D prints is likely to warp, have problems such as uneven layer thickness, and may even cause printing failure.
Leveling is an essential operation when using a resin printer for the first time or when maintaining is on a daily basis. For people who are new to 3D printing, they may not be familiar with the process and operation. As a concise tutorial, we will give a guide on how to level a resin 3D printer and how to level Anycubic Photon Mono X2 step by step.

How to Level Resin 3D Printer
Leveling requires adjusting the build platform, it is a important component of a resin printer and works in conjunction with the resin tank. The resin tank is used to hold liquid resin, and the bottom is transparent. During the printing process, the light source will shine through the bottom of the tank to complete the curing of resin layer by layer. The build platform is where the prints are produced, it moves up and down with z-axis. At beginning of printing, the build platform will sink into the resin vat. The cured resin can adhere to the platform, which lifts up after one layer is cured. The next layer of resin is cured and bonded to the previous layer. This process is repeated until the entire model is printed.
Proper leveling can help us avoid many printing problems. If we want to make higher quality prints, then we should learn how to level a resin printer. The steps to be performed are non complicated:
- Cleaning: Carefully clean the build plate and print screen. The resin tank can be removed and cleaned first, move to another place.
- Adjusting the build platform: Lower above the screen and loosen the build platform screws.
- Leveling: Place the leveling paper between the screen and the build plate and manually adjust until the paper has a slight friction, restore the z-axis of printer
- Fixing: Re-tighten the screws on the build plate, otherwise your leveling may be ineffective.

Guide Step by Step: How to Level Anycubic Photon Mono 2
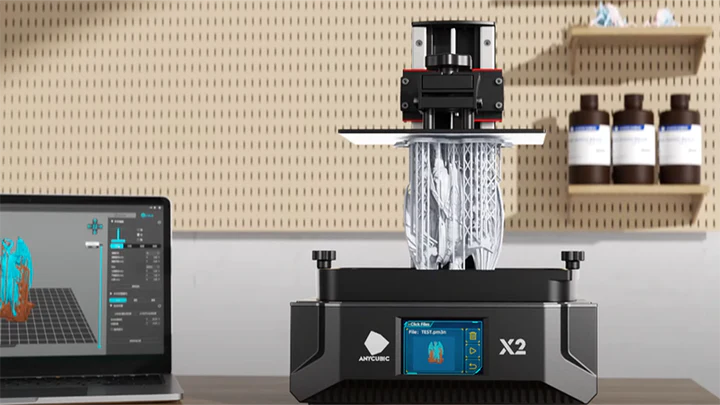
How quickly can we go from receiving a new printer to having it leveled and ready to print? Let’s use Anycubic Photon Mono X2 as an example to explain how to level a resin printer.
Detection: Raise printing platform until the screen can be fully observed. Go back to the Menu and click “Detection”. Set the text time and click Next. The LCD curing screen should display a complete image.

Anycubic Photon Mono X2 is easy to learn and the printer has stable performance, making it one of best choices for desktop-level resin 3D printers. It uses dual linear guides and POM clearance nut combined with a vibration-absorbing structure to ensure the running accuracy of the z-axis and improve the stability of the printer, making it very user-friendly in terms of printing quality and printing experience. In terms of printing accuracy, Anycubic Photon Mono X2 is equipped with a 9.1-inch 4K+ lager size monochrome LCD screen, and uses Anycubic LightTurbo matrix light source to provide higher resolution and more uniform exposure, ensuring that the machine can achieve large-size and high-precision printing.


